Report an employee's start of employment
When the employee enters employment, you need to record the contractual arrangements between the employee and the employer. If you are recording a temporary employment, Profit also records an end date with all of the data. If an employee has entered employment, you can manage the employee's data in Profit HR and process the employee's wages using Profit Payroll.
You can only report an employee's start of employment if they do not currently have a valid employment:
- Employees who have not yet been employed.
- Employees who have been employed in the past (the employment ended yesterday or earlier).
You can also automatically start reporting a person as employed when adding a new employee.
To report an employee's start of employment:
- Go to: HR / Employee / Employed.
Profit shows a view with employees without a valid contract. These are new employees and employees that have the Employment end date completed in the most recent contract.
Note:
This step is skipped if Profit launches the Start of employment wizard after adding a new employee.
- Select the employee.
- Click on: Next.
- Enter the contract data:
- Enter the Contract start date.
- Complete the remaining fields. Choosing the correct CLA/term of employment and employer is very important here.
If the employee has a temporary contract, then Profit calculates the end date of the contract automatically.
- Select Institution registration, Entering service or Other reasons for Reason employed, for the 'GMA' file for 'PGGM'.
- Enter the data for the periodic increase in the wage scale, if the wage scale is configured for this.
For more Information, please refer to
 enter the period for a periodic increase.
- Enter the period of the next periodic increase in Period number periodic. In Education, this is period 8 by default.
Profit automatically determines the period number and displays it in Period next increase (format yyyypp).
- In Repeat after (periods), enter after how many periods the employee is given a new periodic increase. In Education, the default is 12.
- Enter the period of the next periodic increase in Period number periodic. In Education, this is period 8 by default.
- Enter the start date of the contract chain for the Wet Werk en Zekerheid in Contract chain start date.
In the case of a fixed-term contract Profit copies the start date of the contract.
View the Help about the Wet Werk en Zekerheid for more information on recording a contract chain.
- Select the chain number, if applicable.
In the case of a fixed-term contract the field is mandatory.
- Click on: Next.
- Select the organisational unit and the job of the employee.
You can only choose jobs that are available at the employer. If the job is not available at the employer, you can add it straight away.
If you select a position, Profit copies the corresponding job and organisational unit. Profit also copies the cost centre and cost unit, if you are using cost centres and units.
- Select the Multi-school function check box if this concerns a multi-school job. This is only applicable if you have activated the Education functionality.
If the check box is selected by default, this has been configured at the employer level.
- Click on: Next.
- Record the timetable. You have the following options:
- Select the default timetable (from the CLA/term of employment).
- Specify the working hours per day and the breaks.
If this is not possible, delete the default timetable and deselect the Variable work pattern andVariable pattern in work timetable check boxes.
- If an employee does not have fixed working hours, select the Variable work pattern check box. Enter the number of hours and days per week. If possible, also select the check boxes for the working days. In the case of a zero hours contract you enter 0 hours and 0 days.
- In case of a work timetable, select the Variable work pattern and Variable pattern in work timetable check boxes. Always enter the number of hours per week. Click on: Next. Select the timetable cycle and starting week.
- Click on: Next.
- Select the Salary type; this determines which fields you need to complete for this step.
- Select the period table.
The period table determines the periods for processing the wages, for example per month, per four weeks or per week.
In the employer's properties you can record a preferred value for the period table.
- Enter the salary if you have selected Hourly wage or Fixed salary.
- If you have opted for a scaled salary, complete the following steps:
- Select the job grade, if you are using job grades.
- Select Wage scale type and Wage scale.
You can only select data that corresponds with the selected Period table. Furthermore, the CLA type of the wage scale must match the CLA type of the employee's CLA.
- Select the step in the wage scale.
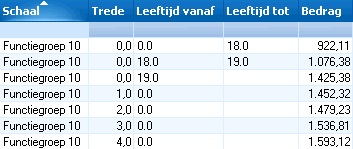
The step depends on the age the relevant employee has reached on the start date of this salary line (that is, not the age reached on the current date). If, because of his age, the employee still falls in an age step, then only this step is displayed. If an employee falls outside the age steps, the service year steps appear.
If you cannot select the step, make sure that the steps have been added to the wage scale, including the validity period of the wage scale.
- If required, enter an allowance. Select the Allowance % check box, if you want to record a percentage. If not, record an amount.
In the case of full-time and part-time workers, select Scale salary or Fixed salary. For other employment types select Scale hourly wage or Hourly wage.
Profit automatically calculates the 'BT' annual wage for the taxation of wage components at a special rate in Profit Payroll.
- Click on: Next.
Profit displays the agencies to be recorded.
You cannot select the agencies that are not available at the employer level. You first need to add the agencies to the employer. Agencies that are relevant for all employees, such as the tax authority, are automatically included by Profit. You cannot undo this selection.
If an agency has an end date at the employer level, then after the end date you cannot select this agency at the employee level any more. However, if you still want to add the agency, you can specify the required code manually.
If applicable, you can enter a pension number. You do not enter a pension number for the pension data delivery of 'APG' and 'PGGM'. For the ‘APG’ and ‘PGGM’ pension agencies, Profit automatically determines the pension number in the External identification number field in the Employment tab in the properties of the contract.
- Click repeatedly on: Next. Now you need to complete the windows with the additional information for the agencies.
- Enter the Bank data. You use a separate wizard for this because Profit saves bank account numbers in a central table of bank account numbers.
- Deselect the Cash payment check box.
- Click on: New.
- Enter the country code and the bank account number.
- Select the Bank type.
- Click on: Next.
- Click on: Finish.
- Click on: Finish.
See also