Link an e-mail confirmation to a course
If you want participants to receive an e-mail message automatically with the confirmation that they have registered for the course, you first have to configure this. You then add a message template and link it to the course. In the e-mail message, you can add a hyperlink to the customer portal (OutSite) from where they can download an invitation (route description).
You add message templates of the type Course yourself and link them to each course.
Note:
The e-mail message can only be sent if an e-mail address has been entered for the contact.
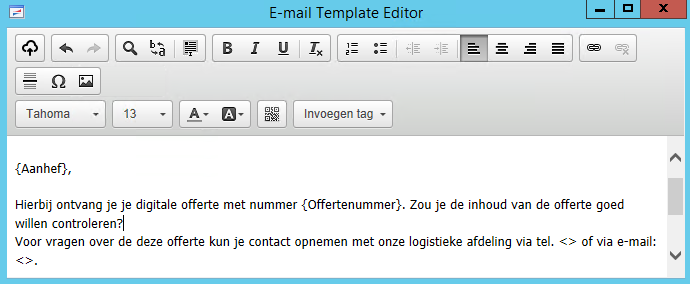
Add a message template for e-mailing the course confirmation and reminder:
- Add a message template of the type Course for the default course confirmation.
- Add fields (tags). For example, for course these are: Aanhef, Cursusomschrijving and a link to the course page.
- If applicable, add a QR code. You use a QR code as a link via which a website can be viewed on a mobile phone. For example for a route description or an action page.
- If applicable, add a QR code with the tag {UniekeDeelnemerSleutel}. When the course confirmation is sent, Profit will generate a QR code with a unique participant key. You can use this, for example, for the identification of the participant when entering the building.
- Click on:
 .
. - Enter a URL address, a QR code already generated by Google or a combination of the two. For a course confirmation you can also enter the tag {UniekeDeelnemerSleutel} as admission ticket.
- Click on: OK.
You now see the image with the QR code.
- Click on:
- Add another message template of the type Course for the text of the reminder. Make it clear in the description of a message template whether it is for the course confirmation or the reminder.
More information:
 View and change a message template
Link message templates to a course:
- Open Profit Windows.
- Go to: CRM / Course management / Course.
- Open the properties of the course..
- Go to the tab: Confirmation.
- In Report invitation, select the invitation to be sent.
- For Message registration, select the message template with the confirmation that is sent when a participant has registered for a course.
Profit sends this confirmation irrespective of whether the participant has registered via the portal or via Profit Windows.
- Select a Reminder report.
- For Reminder message, select the message template you have added for this.
- In Number of days in advance, enter the number of days before the start of the course when the reminder should be sent.
- Click on: OK.